Photos turn into priceless mementos when memorialized in artistic products, especially when your children’s little hands help make them. Your children’s creative juices will continue to flow when you keep them busy doing handcrafted photos. Activities involving photo crafts will allow you to spend quality time with your children while teaching them to appreciate and adore the fond memories captured from the camera’s lens.
Photo Collage
Your children can create a photo collage using recycled photographs. Make the trip down memory lane with this timeless and simple artistic idea. The object is to crop and stick pictures on the collage that highlight milestones in your children’s lives. Gather old photographs and let the kids rummage through the pile and let them select which pictures to include on the photo collage. Make photocopies if you do not want your children damaging precious photographs. Your kids will appreciate the idea of discovering their happy memories while growing up. Instruct them to include photos of you and other family members. The collection can include baby pictures, birthday celebrations, graduation days, vacation trips, sports activities, family get-togethers and many more. Use craft glue or double-sided adhesive tapes to attach photos on any medium they will choose for the collage, which include poster boards, old shoeboxes and old canisters.
Tissue Box Photo Frame
An environmentally friendly activity that your kids can do is creating photo frames out of empty tissue boxes. You will need empty, beautifully decorated, small tissues boxes measuring 4.5-by-5 inches. Choose tissue boxes that have oval openings on the top. Your children will use the tissue boxes to frame photos. Instruct your children to remove the plastic that is sticking inside the opening. Then, they will cut each photo down to a size that will fit inside the box’s opening. Using a double-sided adhesive tape, your children will then attach each photo to the underside of the box’s opening. Adding beads or decorative ribbons around the rim of the box’s opening will add flair to the finished product. They can also add glitter to the tissue boxes to make them look more appealing. Instruct your children to decorate the underside of the tissue box that has the printed manufacturer’s information by using construction or felt paper. Your children can give the picture tissue boxes to their grandparents, relatives and friends.
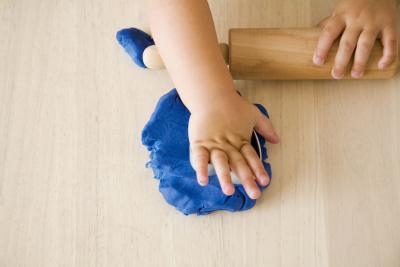
Clay Photo Frame
Give your children molding clay, and they will never get tired of playing with it. Creating photo frames from clays will allow your children to play as they mold different shapes and sizes of frames. Colored clays that are air-hardening are perfect for this type of project. Let your children use their imaginations when molding their clay frames. Your children can also use rubber stamps with letters or different images that they can press against the clays to make imprints. Allow the clay frames to cure before adding photos. Using double-sided adhesive tapes, your children will attach each photo to a piece of cardboard that will serve as the backing for each clay frame. Then, your children will glue the cardboard to the frame, and add a piece of magnet to the back for hanging on the refrigerator door or any other metal surface.