Installing a homemade rain barrels to collect, store and recycle rain water is both environment-friendly and economical. Rain barrels also help reduce the amount of water that may settle around the foundation of your home. Although it may be a time-consuming process, creating your own rain barrels is a project you can accomplish using a little bit of cash, patience and elbow grease.
Step 1
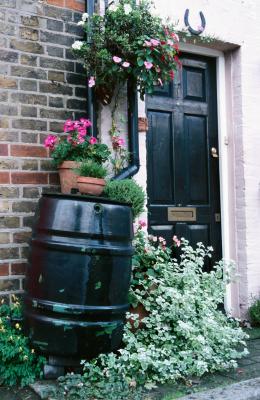
Identify the location for your rain barrel. Anywhere will do, so long as the ground is level and at least slightly elevated for it to drain well. Spaces beneath gutter downspouts are ideal locations to place your rain barrel.
Step 2
Clean inside the chosen barrel thoroughly (preferably food-quality containers, not the kinds that held harsh chemicals) with a mixture of 1/8 cup of bleach and 5 gallons of water.
Step 3
Mark a circle on the top part of the barrel by tracing the outline of the atrium grate. Drill along the marked circle using the jig saw to make a hole. Do not make the hole too big so the flange of the atrium grate fits snugly on top of the barrel without falling in. This hole will house the rainwater inlet. Place a piece of thin mesh to filter debris and to keep mosquitoes out.
Step 4
Drill a hole approximately 1 inch from the bottom of the barrel and then insert a 1/2-inch PVC male adapter into it. Unscrew the PVC male adapter before wrapping Teflon around the threads. Apply sealant to the threads before screwing the adapter back. Wait for 24 hours to allow the sealant to dry before connecting the vinyl hose to the PVC male adapter.
Step 5
Nick a part of the top barrel rim using the jig saw to create a notch. The notch you create should align to the outlet at the bottom of the barrel. Then place the coupler firmly into the notch.
Step 6
Place concrete cinder blocks on your chosen barrel location to provide a strong, stable and level platform for your rain barrel that is about 20 inches from the ground. If you need more than one layer, stack the cinder blocks in a crisscross pattern so they won’t tip over. Elevating the barrel will allow water to flow freely into the barrel and provide enough room to drain the water later using a bucket.
Step 7
Measure where you need to cut or disconnect your downspout so that the barrel fits beneath it. Disassemble the downspout at the gutter by taking out screws or drilling out rivets. If it’s too long, cut off your downspout using a fine-toothed hacksaw blade or tin snips. Using a gutter elbow will modify the downspout and divert water into the barrel.