A pedicure is the most luxurious gift that you can give your feet. After walking and standing for hour after hour, day after day, your feet will appreciate a little TLC. Salon pedicures tend to be pricey, especially if you opt to treat yourself on a monthly basis. But you can perform your own professional pedicure in the privacy of your own home, pamper your sore feet and save yourself some money.
Step 1
Remove all traces of nail polish from your previous pedicure. Saturate a cotton ball with an acetone nail polish remover and rub the cotton ball against each of your toenails. You may need to saturate more than one cotton ball to remove the nail polish.
Step 2
Fill a footbath with warm water. If you do not have a footbath, use a large bowl or cooking pot that can accommodate the size of your feet and enough water to cover them. Add a squirt of liquid foot soap to the warm water. Foot soaps come in moisturizing and antibacterial varieties.
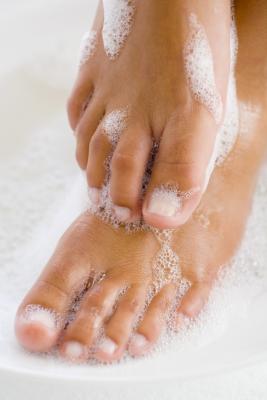
Step 3
Soak your feet in the footbath for a minimum of 10 minutes to soften and disinfect your feet. Soak your feet longer if you prefer to further enhance the softening process.
Step 4
Clean underneath each of your toenails. You have two choices when it comes to toenail cleaning. Either use a toenail scub brush, utilizing the soapy water of the footbath as you slide the scrub brush back and forth over your toenails, or a toenail-cleaning tool. The toenail-cleaning tool usually has a small hook on one end and a point on the other, which you gently slide under the white area of each toenail to remove dirt. Use the hook to remove dirt in the corners of your toenails and the pointed end for the remainder of the cleaning.
Step 5
Remove your feet from the footbath after soaking and pat them dry with an absorbent towel. Clip each of your toenails straight across using a pair of toenail clippers, cutting no shorter than the skin line. Go over your cut toenails with a few swipes of a nail file to remove any jagged edges.
Step 6
Apply cuticle cream to the tip of a cotton swab and apply it to the cuticles of each of your toenails. Massage the cuticle cream into your toenail cuticles using your fingertips.
Step 7
Push each of your cuticles back, gently, using a cuticle pusher. The cuticle pusher is simply a metal or plastic stick with a smooth, rounded edge that helps push your cuticles back against the skin, giving your toenails a tidier appearance.
Step 8
Rub the skin of each foot, your ankles and your lower legs with an exfoliating foot scrub. Massage a generous amount of the scrub over your skin, paying close attention to the area of your heels and the balls of your feet. An exfoliating cream will help remove dead, callused skin.
Step 9
Wipe away the excess foot scrub with a damp washcloth. Pat your feet dry with a towel. Massage a moisturizing foot lotion into the skin of your feet, ankles and lower leg. Continue the massage until your skin absorbs all of the lotion.
Step 10
Saturate a cotton ball with witch hazel and rub it over each of your toenails to remove oils left behind by the cuticle cream, foot scrub and lotion. Place a cotton ball in between each of your toes to separate them or use a foam pedicure separator.
Step 11
Apply a thin coat of your favorite polish to each toe. Follow up with a second thin coat of polish. Apply a thin layer of clear-coat nail polish over the two layers of colored polish to protect and add shine. Allow the polish to dry for at least one hour before slipping on a pair of socks or closed-toe shoes.