DIY Blood Dripped Candles
Let's Craft is a special feature full of great crafts, inspiration and DIY projects that are perfect for any Modern Mom!
- Log in to add favorite
- Share
Let's Craft is a special feature full of great crafts, inspiration and DIY projects that are perfect for any Modern Mom!
This craft is not only brilliant but super easy!
All you need is a red candle, a white candle, and a lighter. Let's go!
Directions:
Place your candles on a piece of paper so the wax doesn't get onto any other surface. Now light your red candle and let the flame go for about a minute until you have a small puddle of wax.

(Careful!)
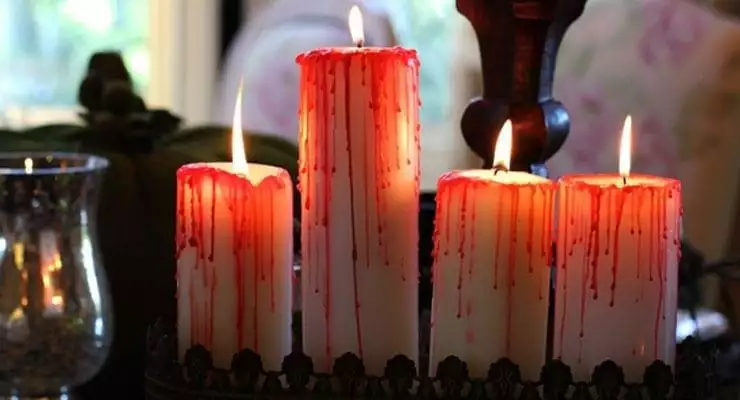
Tip the red candle and pour the red wax onto the edge of the white candle. I used a taper candle this year and that too was very easy. Just leave the candle lit as you drip the red wax around the white candle.

(Keep moving the red candle around until the drips look like blood.)
And that's it. The wax dries instantly and you can save them year after year.
Happy Halloween!
Want to see Jessie take you through it step by step? Check out the video below:
Jessie Jane is the founder of Lilyshop.com, an online marketplace for all things handmade and vintage. Lilyshop inspires and encourages creativity, passion, and endless curiosity with fun recipes, daily tips, and craft ideas while also providing a platform for those to share their own creations, each within their own “shop".
Visit Lilyshop.com and don't forget to follow Lilyshop on Facebook for recipes, craft ideas, and weekly tips.
| Visit our sister sites | MommyTracked Printable Calendars |
BabooshBaby Post-pregnancy Wrap |
(c) Copyright 2013 Mom, Inc. All Rights Reserved.
Reproduction of any portion of this website only at the express permission of Mom, Inc.
The information provided on ModernMom is for educational use only. It should not be used as a substitute for professional medical advice, diagnosis or treatment.

