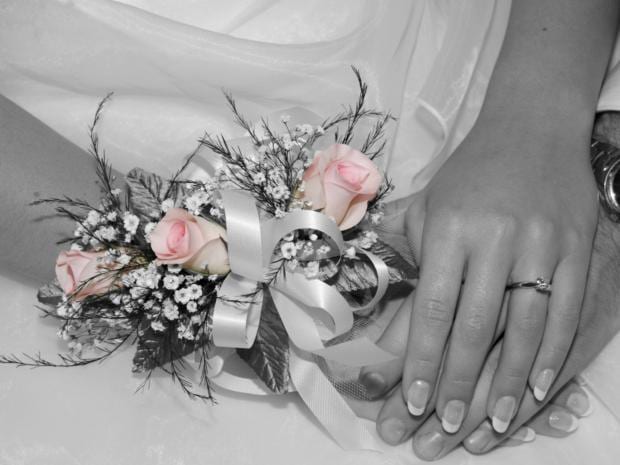
A mommy corsage is a popular gift item for Mother’s Day and baby showers. A mother or mother-to-be receives the corsage as a gift from their children, spouse, friends and other family members. It is a way to honor a mother for all her sacrifices, hard work and for being a great mom. A mommy corsage often uses fresh flowers; however, it can also use flowers made from other materials and may include charms and other accessories that symbolize what the recipient likes or cherishes. The recipient wears the mommy corsage all day long or until the celebration ends, by pinning it on the upper left side of the clothing or by wearing it around the wrist.
Standard Corsage
Step 1
Gather three pieces of flowers. When using fresh flowers, choose flowers that can last a long time, such as roses, orchids or calla lilies. Cut each flower short, with only 1 inch remaining on each stem. Set them aside.
Step 2
Prepare the fillers to use. Fillers are flowers that are much smaller than the main flowers in the arrangement. Their purpose is to fill the gaps to give the corsage a fuller look. Examples of popular choices of fillers are baby’s breath, stephanotis or lily of the valley. You can choose filler flowers that are fresh or made of silk. Cut the filler flowers’ stems short, with at least 1 inch of each stem remaining.
Step 3
Cut several pieces of floral wire to at least 2 to 3 inches long.
Step 4
Tape each flower with a floral wire. Put the floral wire and the stem together, using a tape to connect them to each other. Wind the tape around the stem and floral wire as tight as possible until you reach the end part of the wire.
Step 5
Cut several pieces of leaves that will serve as the background for the flower arrangement.
Step 6
Tape the leaves to the floral wire in a similar fashion used in Step 4.
Step 7
Tape the three main flowers together with a floral tape. Add the filler flowers, inserting one bunch at the center and adding other pieces around them. Wrap them together with tape.
Step 8
Tape the leaves at each side of the corsage. Wind the tape all around the stems of the leaves and all the flowers. Wind them together as tight as possible.
Step 9
Attach the decorative wire to the corsage. You can get decorative wires from craft stores; they come covered with soft material in different color choices. Choose white or any color that matches the color of the main flowers. The decorative wire will hold the wrist corsage together and attach the corsage to the wrist. Cut it to the length that will be long enough to go around the wrist of the recipient.
Step 10
Add ribbons to decorate the wrist corsage. You can wrap the decorative wire with a beautiful fabric ribbon to make it more attractive.
Boutonniere Corsage
Step 1
Gather the main flowers in odd numbers; you can use three, five or as many as seven flowers. Cut each flower short, between 1 and 2 inches each.
Step 2
Repeat steps 2 to 8 of Section 1.
Step 3
Tie a piece of ribbon to the corsage.
Step 4
Add embellishments by using the glue gun. For example, add small charms and beads by dabbing glue carefully in between the flowers and fillers.
Step 5
Attach a safety pin at the back of the corsage.
Warnings
- Be careful when handling the glue gun for it can be very hot.