This project comes from, Jessica Begum, the crafty momma behind the blog Hipster’s Tea Party.Check out her tutorial for how to make your own paper snowflakes:
“It’s official! Winter is here! I’m celebrating winter by making paper snowflakes. Want to join me?
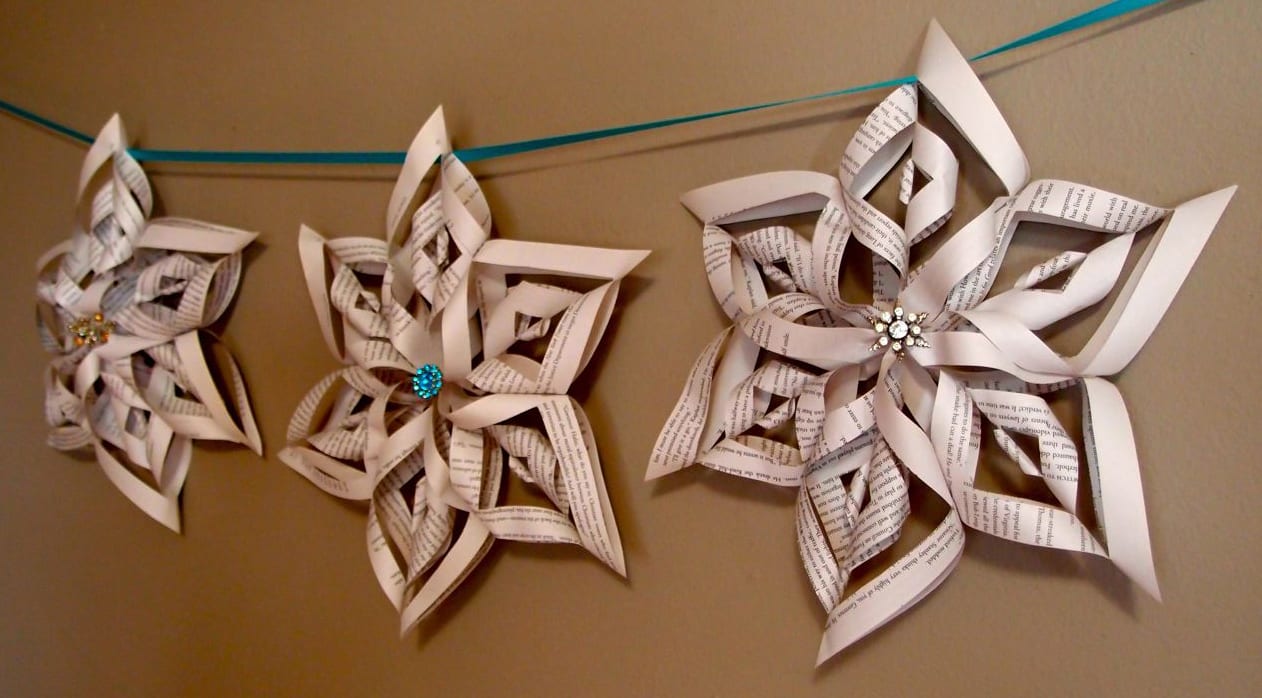
These snowflakes are made from old book pages and finished with a vintage pin to give them a little vintage charm. You can use an old book, colored paper, white paper or even an old hymnbook (dang! I wish I would have done that!) to personalize them. This is a great craft to do with your older kids over winter break to get them away from the television ;)”
Supplies
- 6 book pages per flake cut down to 5″ x 5″
- Scissors
- Ruler
- Pencil
- Glue- I used Yes! Paste because that’s what I had. I’m all about using what I’ve got, but a glue stick would have been better. Hot glue if you’re doing these without the kids.
- Stapler
- A vintage pin, if you happen to have a collection of stuff like that. If not, a pretty button hot glued in the center would do the trick.
Directions
Okay, let’s start!
Take a 5×5 page and fold it diagonal so it makes a triangle. Crease the edge well. I’ll refer to this edge as the “hard edge.” Fold your triangle in half to make a smaller triangle, but don’t crease it too hard. This is your “soft edge.”

hard edge ———————————————— soft edge
Take your ruler and line it up on the bottom of your soft edge. It should be 3 1/2″. The 3 1/2″ mark on the ruler should be at your hard edge.

Mark 1″, 2″ and 3″ off on the soft edge.
Cut from your mark diagonally towards your hard edge, stopping about an 1/8″ from the hard edge.

Don’t cut all the way through!
Open your page and it should look like this:

Take the center small diamond shape and pull the edges up and glue together overlapping one on top of the other.

It helps to do this over a thin brush handle or pencil.
Turn the whole page over and do the same to the next diamond.

Turn over again, and finish with the largest diamond.
You should get a cute little paper swirly thing that looks like this:

Do this five more times, so you have a total of six swirly things.
Stack all 6 of the bottom points together on top of each other and staple together. It will open up into your snowflake. To secure it together, glue the middle points together where they touch.

Finish by pinning a pretty pin in the center or gluing on a sparkly button.
Happy winter solstice!