
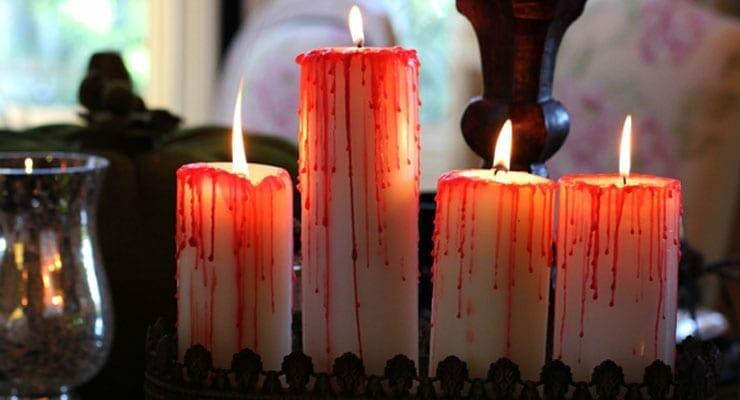
DIY Blood Dripped Candles
Let's Craftis a special feature full of great crafts, inspiration and DIY projects that are perfect for any Modern Mom! This craft is not only brilliant but super easy! All you need is a red candle, a white candle, and a lighter. Let's go! Directions: Place your candles on a piece of paper so the wax doesn't get onto any other surface. Now light your red candle and let the flame go for about a minute until you have a small puddle of wax.

DIY Blood Dripped Candles

This craft is not only brilliant but super easy!

All you need is a red candle, a white candle, and a lighter. Let’s go!

Directions:

Place your candles on a piece of paper so the wax doesn’t get onto any other surface. Now light your red candle and let the flame go for about a minute until you have a small puddle of wax.

(Careful!)

Tip the red candle and pour the red wax onto the edge of the white candle. I used a taper candle this year and that too was very easy. Just leave the candle lit as you drip the red wax around the white candle.

(Cool!)

Keep moving the red candle around until the drips look like blood.
And that’s it. The wax dries instantly and you can save them year after year.

Happy Halloween!

Want to see Jessie take you through it step by step? Check out the video below:

Share:

More Posts

Halloween Party for Kids

Fun Outdoor Halloween Games

Looking for outdoor Halloween games for kids? Try these fun pumpkin games, relay races, scavenger hunts and spooky backyard activities.

Find more

content you’ll love ♥

Get parenting tips, health advice, easy recipes and lifestyle hacks—made to support you through every stage of motherhood, from little kids to teans and beyond.

By subscribing to this newsletter, you agree to our Privacy Policy and Terms of Use.

Lifestyle

Finance

Relationships

Parenting

Health

Teen Talk

Must Have