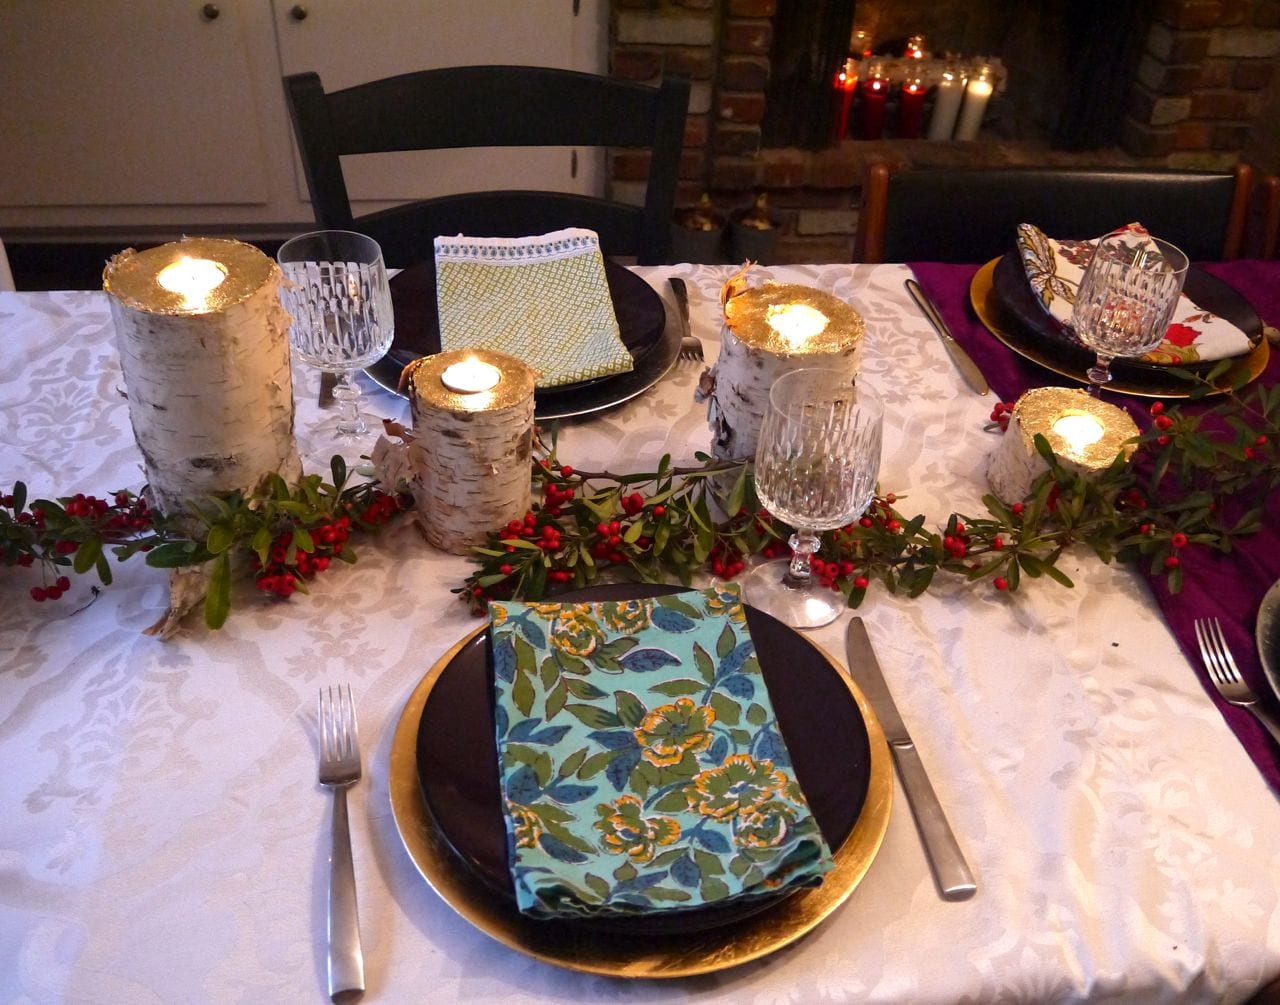
The birch tree is one of my favorite holiday crafting resources because there is just so much you can do with its gorgeous bark! This time I made birch tea light holders to put down the center of my holiday table. Aren’t they just beautiful?
This is one of many, many craft ideas if you can get a hold of some birch logs. I was lucky enough to get these from my good friend Sonya who was going to cut them up into firewood!! Shame on you, Sonya.
This craft requires a bit of power tool know how, so novices, stand back… or give your handyman neighbor a 6 pack of beer to cut the logs up for you 😉
Supplies:
- A couple of birch logs, no more then 6″ in diameter
- 1 1/2″ Spade drill bit
- Sand paper
- Gold leaf kit
Directions:
Start by cutting up the birch logs into different heights. Mine varied between 3″ and 12″. You’ll need a Miter saw to do this.

Remember to wear those safety goggles!
Once you’ve got the logs cut up, you’ll need to drill a hole for the tea light to fit. Use a 1 1/2″ spade drill bit to drill down the center of each holder until the tea light sits level. DON’T drill too far down, or the birch could catch fire. so careful! You will need some sort of clamp to hold the birch in place while you drill. Otherwise they will spin all over the place. Been there, done that! I’ve got a workbench clamp I used. If you don’t have a work bench, I was thinking you could use a Christmas tree stand. Tis’ the season!

 After the tea lights were drilled, I gold leafed the top of each holder to give them that extra special holiday charm. And boy, did it work! The gold leafing on the tops make the whole piece look so elegant.

Stunning, really.
Just follow the directions on the gold leafing kit. Super easy. I received so many compliments at my holiday party! Soooo many! I know you will too. Good luck!!! Happy holidays!