Prepare a variety of Halloween arts and crafts projects for your child, whether you’re decorating for the holiday or a Halloween party. Some children might prefer to make spooky Halloween props, while others like to keep things friendly and non-threatening. Cater the crafts to your child’s interests and capabilities.
Paper Crafts
Paper crafts, such as greeting cards or invitations, can serve as keepsakes, as well as a logical way to say “Happy Halloween” to friends and family or set the tone for a Halloween party.
Create a simple card or invitation using black card stock or construction paper. Fold the card in half, and use a white crayon or pencil to quickly–and roughly–cover the middle portion of the front of the card. Use black acrylic paint or a black marker to write “Boo!” on the front and a white marker or whiteout to write a greeting or party details inside the card. Cover a ball of tissue with a small square of white material, and tie a black string around the bottom of the “head” to create a ghost. Draw on a face, and glue the ghost to the front of the card using craft glue.
Help your child create a door hanger in his favorite Halloween shape, such as a mummy, spider or ghost. Use thick construction paper or poster board in the color that goes with his shape, such as white for a ghost or black for a spider. Draw the shape on the paper, using stencils if necessary. Cut out the shape, and decorate it with crayons, colored pencils or markers. Trace the shape on the paper, and cut it out so that you have two identical pieces. For example, draw thin lines on a mummy to resemble the wrapping. Use the same colored paper to create the hanging part that will wrap around the handle, making it at least an inch thick. Glue the two pieces together, sandwiching the handle between them. Each side can display a different message or simply serve as the front and back of the Halloween creature.
Hanging Decorations
Help your child make decorations she can hang in her bedroom, near the front door or anywhere else. Seeing her crafted decorations will likely bring her joy during your party and for a few days leading up to the holiday. Save her homemade decorations to reuse each year.
Use white chenille stems–sometimes called pipe cleaners–to create a skeleton you hang from the doorknob, ceiling or on the wall. Cut three regular stems and two thin stem into smaller pieces. Twist and glue the regular-sized stems into the main body of the skeleton including the spine, shoulders, arms, hips, legs and feet. The thin stems become the fingers and ribs. Use a white cotton ball or pompom as the head and a small piece of felt as a bow tie.
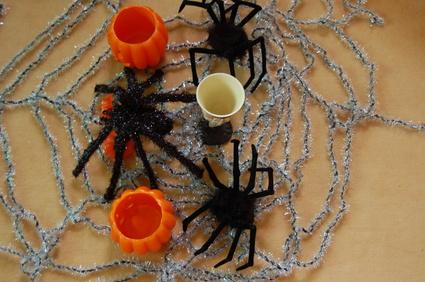
Make scary- or funny-looking black spiders to hang from the ceiling or trees. Cut a plastic foam ball in half, and paint both halves black using acrylic paint. Use eight fuzzy chenille stems–cut in half–to create the spider’s legs. Glue four legs onto each side of the plastic foam spiders. Add googly eyes to each spider. Poke a small hole in the spider using something such as a toothpick and glue clear string, such as fishing line, in the hole. Once the glue dries, you can hang the spiders.
Table Decorations
Table decorations can include favors, place cards, centerpieces or any decoration you want to highlight and display on a table.
Use nontoxic paint to decorate a small or medium terra cotta pot. Let your child decorate the pot if he enjoys being creative. He can paint it to look like a jack-o’-lantern, piece of candy corn or ghost. Use the pot as a votive candle holder on your table, or put one at each place setting as a favor for a party.
Help your child make a miniature cemetery to serve as a centerpiece. Glue green tissue paper onto a shallow cardboard box, such as sweater box, to serve as the base for your graveyard. Add spooky trees using real twigs from your yard. Glue leaf-shaped paper onto the twigs and poke the bottom of the stem through the cardboard box. Make tombstones out of craft foam or corrugated cardboard covered with black or red tissue paper, followed by a layer of white tissue paper. Use a marker to write messages or names on the headstones. Add other shapes to make it spooky, such as ghosts, small plastic spiders or black cats.