 Here is just a sampling of the things I heard which inspired this project:
“Then, all of a sudden, hearts appeared on the walls of my bedroom.”
“I was riding on top of a rainbow and I fell down but then I came back up directly.”
“I was on my couch and lava fell from the sky.”
“They glued the hotel onto a plant.”
“There was some red ‘Connect Four’ pieces that hopped into a cannon and got trapped.”
What do all these amazing one-liners have in common? No, they’re not a reenactment of Fear and Loathing scenes, or a distant memory of your college “experimental” days…
They’re highlights from the dreams of some of the kids I work with! (By the way, just what do you feed them for bedtime snacks?!)
You see, we sought out to create a collaborative dreamcatcher. I got the idea after hearing some amazing stories of dreams and realizing that, despite knowing I constantly have dreams, I simply cannot ever remember a single one. Ever! Might have something to do with the Old Fashioned I have before hitting the hay…but that’s neither here nor there.
While discussing our plan, each child got the chance to draw a dream that they remember- a happy, funny, nonsensical dream, or even a scary nightmare that they wanted to banish forever. I wrote the story of each dream on the back page, dictated to me word for word. Then we all worked together with some recycled materials and just plain pretty shiny things to make a piece to add to the catcher itself.
Now not only do we have a fabulous piece of Native-American-inspired voodoo to add to our environment, but also a recorded time capsule of the dreams of preschoolers. Cuz who hasn’t had a moment, looking at their child, and thought to themselves: “Just what is going on in that little head of theirs?”
Materials:
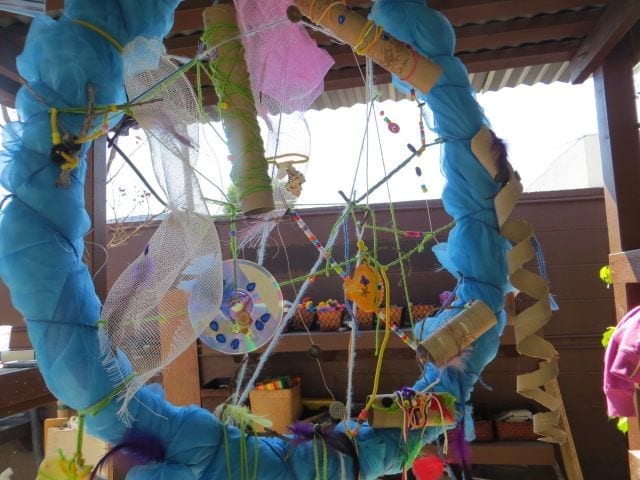
- For the base, two foam pool noodles, duck taped together at the ends to meet in a large circle (you could use just one pool noodle to make smaller, or even a hula hoop)! I recommend the pool noodles seeing as they are a soft, light material that is easy to attach other items to or stick in, as the case may be.
- Scraps of fabric (I allowed the children to wrap and tie this around the noodles as wanted to add color and texture)
- Multicolored yarn
- Recycled materials from around the house: toilet paper tubes, broken puzzle pieces, craft gems, seashells, beads, spools, feathers, etc.
- Glue, if needed to hold down small pieces
Let your little one go wild creating each piece of yarn or string, attaching as much or as little as they wish. Tie each piece of yarn all the way across the circle at various angles, attach at both ends.
The goal is to have them intersect all the way around the loop, creating a spiderweb-like effect to showcase all their work.

Sweet dreams!