

7 Proven Car Seat Safety Methods Every Parent Must Follow
Mastering car seat safety requires three foundational steps: selecting the right restraint for your child’s specific height and weight, securing the seat tightly with the vehicle seat belt or LATCH system and top tether, and ensuring a snug harness fit with the chest clip at armpit level. By keeping children rear-facing as long as possible, avoiding common installation pitfalls, and verifying crash and recall histories, parents can maximize protection on every journey.
Method 1: Select the Right Restraint for Your Child’s Size and Age
Choosing the correct car seat is not about finding the most expensive model on the shelf. The safest seat is always the one that fits your child’s physical dimensions, installs securely in your specific vehicle, and is easy for you to buckle correctly on every single trip.
Whether you are bringing home a newborn in an infant carrier, securing an active toddler in a convertible model, or setting up an all-in-one seat for a growing preschooler, restraint choice depends on physical size rather than age minimums. As highlighted in the CDC child passenger safety guidelines, matching your child to the correct stage is vital because every step up in seat category actually represents a small step down in total crash protection.
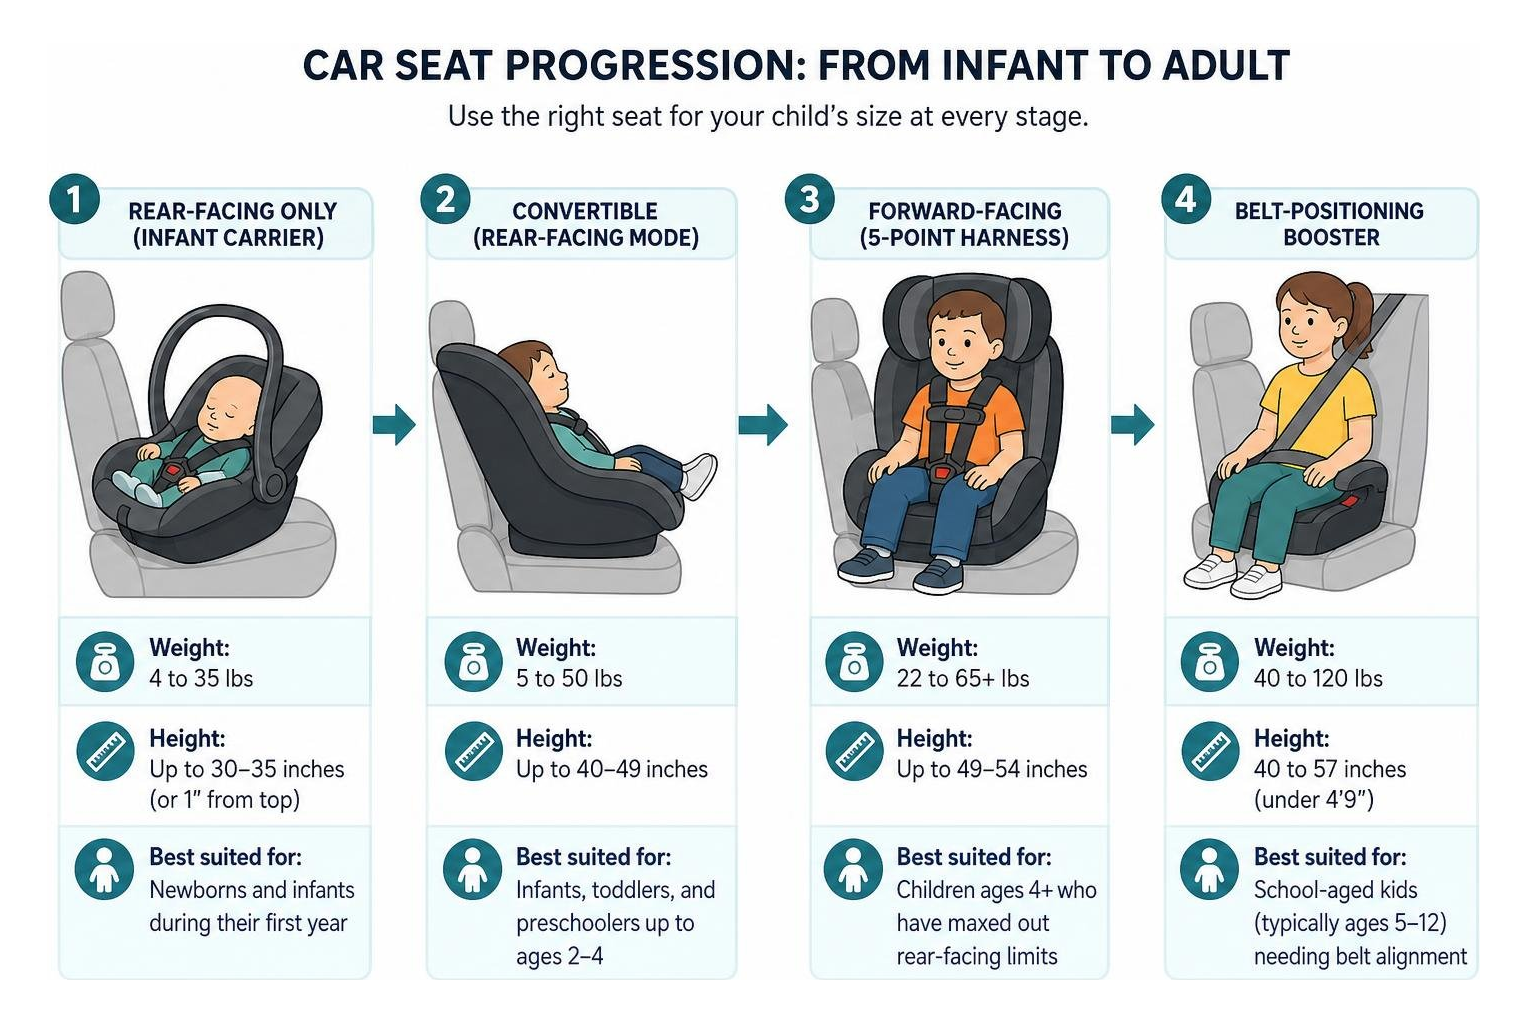
| Car Seat Type | Typical Weight Range | Typical Height Limit | Best Suited For |
|---|---|---|---|
| Rear-Facing Only (Infant Carrier) | 4 to 35 lbs | Up to 30–35 inches (or 1″ from top) | Newborns and infants during their first year |
| Convertible (Rear-Facing Mode) | 5 to 50 lbs | Up to 40–49 inches | Infants, toddlers, and preschoolers up to ages 2–4 |
| Forward-Facing (5-Point Harness) | 22 to 65+ lbs | Up to 49–54 inches | Children ages 4+ who have maxed out rear-facing limits |
| Belt-Positioning Booster | 40 to 120 lbs | 40 to 57 inches (under 4’9″) | School-aged kids (typically ages 5–12) needing belt alignment |
Method 2: Lock Down Proper LATCH and Seat Belt Installation
More than half of all child restraints are installed incorrectly. You can secure a car seat using either the vehicle’s Lower Anchors and Tethers for Children (LATCH) system or the standard vehicle seat belt. Never use both systems at the same time unless your car seat and vehicle manuals explicitly allow dual installation. Using both can put unintended stress on safety mechanisms during a collision.
Keep these core installation rules in mind:
- Respect the 65-Pound LATCH Limit: The lower anchors in your vehicle have a maximum weight capacity of 65 pounds total. This includes the weight of the child plus the weight of the car seat itself. If your seat weighs 25 pounds, you must switch from lower anchors to the vehicle seat belt once your child reaches 40 pounds.
- Always Connect the Top Tether: For all forward-facing seats, always attach and tighten the top tether strap to the dedicated vehicle anchor point. This simple strap reduces dangerous forward head movement by 4 to 6 inches in a crash.
- Perform the 1-Inch Movement Test: Grasp the base of the car seat right at the belt path with both hands. Pull firmly side-to-side and front-to-back. If the seat moves more than 1 inch in any direction, tighten the seat belt or lower anchor straps further. For detailed installation steps, refer to the NHTSA car seat installation standards.
Method 3: Dial In Car Seat Safety with Perfect Harness and Chest Clip Fit
Once your seat is anchored tightly to the vehicle, securing your child inside requires precision. The harness keeps your child firmly positioned within the protective shell of the seat during sudden braking or collisions.
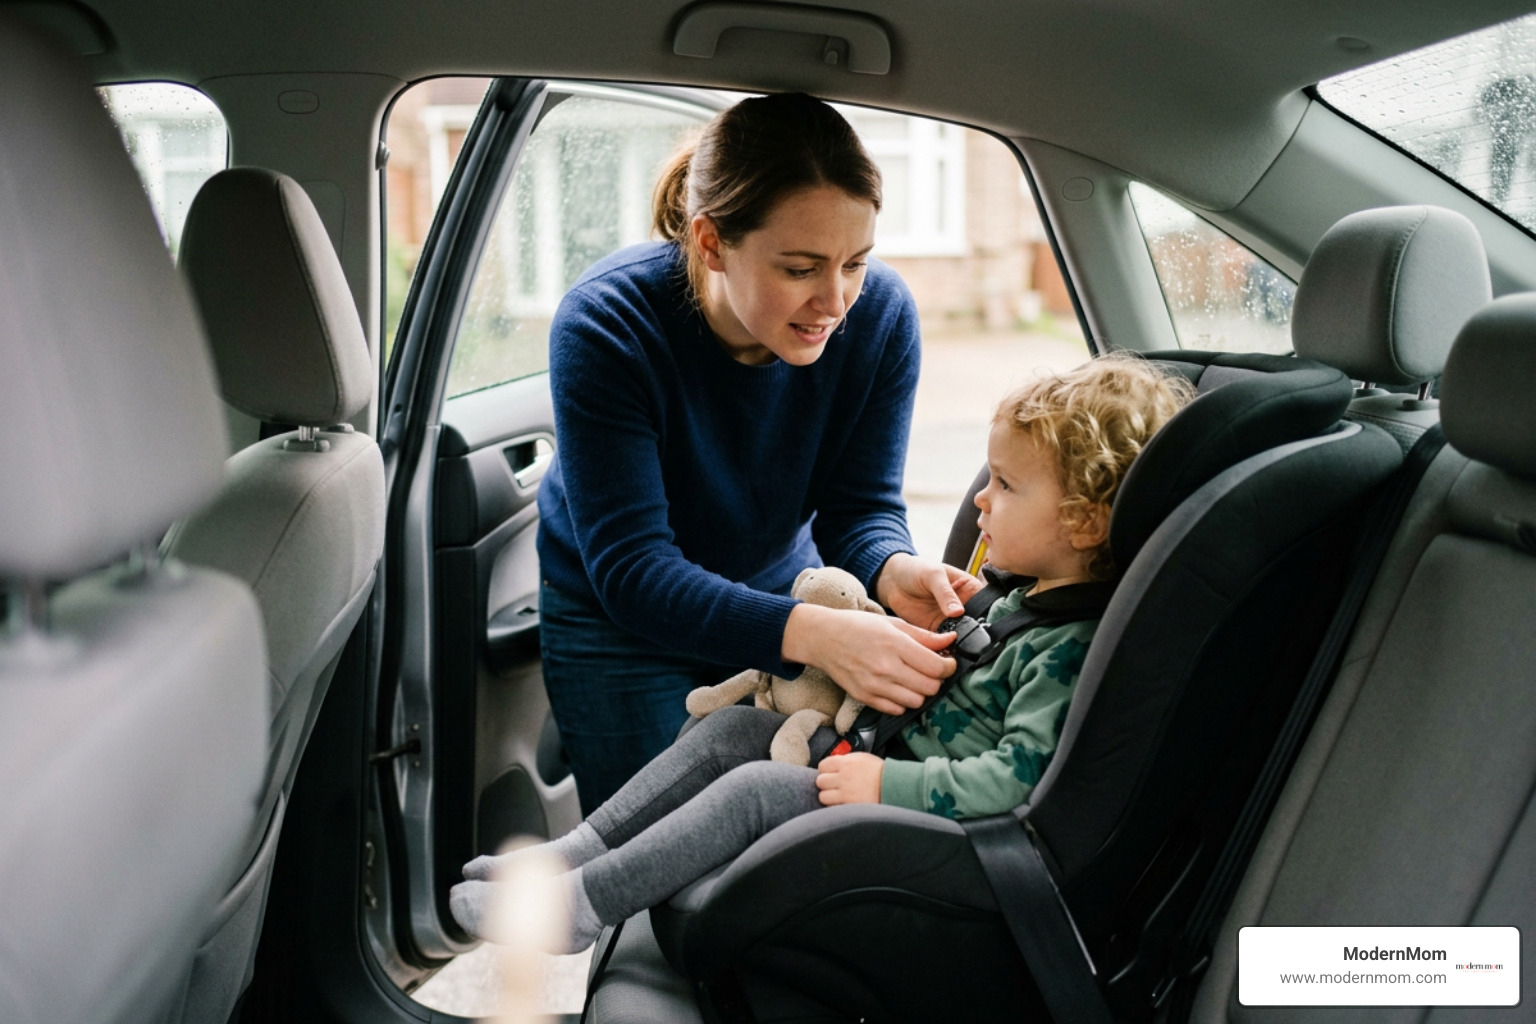
Follow these steps on every ride:
- Check Shoulder Slot Height: For rear-facing seats, harness straps must thread into slots located at or below your child’s shoulders. For forward-facing seats, harness straps must be positioned at or above shoulder level.
- Align the Chest Clip: Position the chest clip directly across the sternum, level with your child’s armpits. Placing it too low over the soft abdomen can lead to internal injuries, while placing it too high near the neck causes discomfort and poor strap placement.
- Pass the Pinch Test: After buckling and tightening the harness, attempt to pinch the strap webbing vertically at your child’s shoulders using your thumb and index finger. If you can pinch any excess fabric, the harness is too loose and needs tightening.
- Avoid Bulky Winter Coats: Puffy coats and snowsuits compress under crash forces, leaving inches of dangerous slack in the harness webbing. As outlined in the Mayo Clinic car seat safety guidelines, dress your child in thin, warm layers instead, and tuck a cozy blanket or their coat over top of the buckled harness.
Method 4: Time Restraint Transitions Using Objective Milestones
Parents often look forward to turning their toddlers forward-facing or moving older kids into boosters. However, premature transitions put children at greater risk. Always rely on height and weight limits rather than age or peer milestones.
- Extended Rear-Facing: Keep toddlers rear-facing until they reach the maximum height or weight allowed by your convertible car seat (often 40 to 50 pounds). Children’s legs are naturally flexible, and touching the vehicle seat back poses no risk of leg fractures.
- Harness to Booster: Do not rush into a booster seat at age 4. A child should remain in a 5-point harness until they reach the maximum forward-facing limit (typically 50 to 65 pounds) and demonstrate the behavioral maturity to sit upright without slouching.
- The 5-Step Seat Belt Test: A child is ready to ditch the booster only when:
- Their back sits flat against the vehicle seat back.
- Their knees bend naturally over the front edge of the seat cushion.
- Their feet rest flat on the vehicle floor.
- The lap belt rests low across their upper thighs and pelvis (not across the stomach).
- The shoulder belt crosses the middle of their collarbone and chest (not cutting into the neck).
Keep all children younger than 13 seated in the back row, away from the high-force deployment zone of front-seat passenger airbags.
Method 5: Eliminate Dangerous Usage Pitfalls and Sleep Hazards
A car seat is designed specifically as an automotive safety device, not an alternative crib. Newborns have heavy heads and weak neck muscles. If a seat is improperly reclined, an infant’s head can tip forward, causing airway obstruction and positional asphyxiation.
- Maintain a 45-Degree Recline for Newborns: Always check your seat’s built-in bubble or line level to ensure newborns ride at the correct semi-reclined angle to keep their airways clear.
- Skip Unapproved Aftermarket Add-ons: Avoid third-party strap covers, head positioners, bundle bags, or hanging toys that did not come in the original box with your seat. These products are not crash-tested to federal safety standards and can alter harness geometry during an impact.
- Clean Harness Straps Correctly: Spills and messes happen frequently during busy school runs. When tidying up, learn how to clean Britax car seat components properly. Never soak harness straps in hot water or harsh chemicals, as this degrades the protective tensile strength of the safety fibers.
- Transfer Sleeping Babies Promptly: When you reach your destination, move your sleeping infant out of their car seat carrier and onto a firm, flat sleep surface.
Method 6: Verify Expirations, Recalls, and Crash History
Car seats do not last indefinitely. Temperature swings inside vehicles, UV exposure, and routine mechanical wear degrade plastic shells and structural integrity over time.
- Check Expiration Dates: Most seats expire within 6 to 10 years of manufacture. You can locate the expiration date stamped directly into the bottom or back of the plastic shell.
- Avoid Used Seats with Unknown History: Never accept a secondhand car seat from a yard sale or online marketplace. It may have hidden micro-fractures from a previous collision, missing components, or past safety recalls.
- Replace After Crashes: Follow manufacturer guidelines for replacement following an accident. Moderate or severe crashes always require immediate car seat replacement.
- Register for Recall Notices: Mail in the registration card that comes with your seat or register online with the manufacturer. You can also download the NHTSA SaferCar app to receive real-time notifications if your model is ever subject to a safety recall.
Method 7: Protect Kids During Travel, Carpooling, and Summer Heat
Safety rules apply whether you are traveling across town or across the country. Summer vacations and daily school carpools introduce extra variables that require planning.
- Airplane Restraints: When flying with children under 40 pounds, look for the label reading “This Restraint is Certified for Use in Motor Vehicles and Aircraft.” Using a harness on a plane protects little ones from severe runway turbulence.
- Rideshare Safety: Never hold a baby in your lap in an Uber or Lyft. Carry an infant bucket seat or a lightweight, portable travel booster to ensure your child remains buckled safely on every ride.
- Prevent Hot-Car Heatstroke: Temperatures inside a parked car can rise by 20 degrees in under 10 minutes, creating life-threatening conditions even on mild days. Create simple daily habits: leave your left shoe, work badge, or phone in the back seat, and always check the rear row before walking away. Pair these precautions with practical summer vacation car travel tips to keep every road trip safe and stress-free.
Maximizing Long-Term Protection on Every Family Trip
How to Maintain Car Seat Safety Across Multi-Vehicle Carpools
Juggling school pickups, sports practices, and playdates means your children will often ride in other vehicles. Clear communication between caregivers ensures that safety never takes a back seat to convenience.
- Verify Seat Compatibility: Confirm that the driving parent’s vehicle has adequate seating and anchor points, especially if fitting multiple restraints across the back row.
- Train Alternate Caregivers: Show grandparents, babysitters, and carpool partners how your child’s specific harness or booster operates.
- Keep Portable Restraints on Hand: If your child participates in rotating carpools, keep an easy-to-install high-back or backless booster ready for quick transfers. Reviewing holiday safety tips for busy moms is a great way to stay organized during busy travel seasons.
Professional CPST Inspections and Free Verification Resources
If you ever feel uncertain about your installation, you do not have to guess. Nationally certified Child Passenger Safety Technicians (CPSTs) are trained specialists who provide free hands-on and virtual seat checks.
Technicians will review your seat’s position, teach you how to achieve a tight installation, and verify your child’s harness fit. You can find free local inspection stations or book a virtual consultation by calling 1-866-SEAT-CHECK or visiting the National Child Passenger Safety Board directory. For additional medical and developmental insights, consult the Cleveland Clinic child passenger recommendations.
Frequently Asked Questions About Child Passenger Safety
When is a child ready to transition from a booster seat to a regular seat belt?
Children are typically ready between the ages of 8 and 12, once they reach a height of 4 feet 9 inches (57 inches). Always confirm that your child passes all 5 steps of the seat belt fit test in every specific vehicle they ride in before setting aside the booster.
Can you install a car seat using both lower anchors and a seat belt at the same time?
No. You should use either the vehicle seat belt or the lower LATCH anchors, but not both at once. Using two installation systems simultaneously can exert unexpected stress on the car seat frame and vehicle anchor points during a collision, unless both manufacturers specifically permit dual use in their manuals.
Is it safe for a baby to sleep in their car seat outside of the vehicle?
No. While a car seat maintains a safe, semi-reclined angle when securely clicked into its vehicle base or an approved stroller, placing an infant carrier on the floor or a bed can cause your baby’s head to drop forward. This chin-to-chest position restricts breathing and poses a serious risk of positional asphyxiation. Always transfer sleeping babies to a flat, firm sleep surface.
Conclusion
Keeping our little ones safe on the road does not require advanced mechanical skills—just a commitment to consistent, proactive checks on every ride. By choosing the right seat for your child’s size, locking down a secure installation, and ensuring a snug harness fit, you give your family the highest level of protection possible.
Take a few minutes today to check your car seat’s belt path, verify strap heights, and consult a certified technician if you have questions. If your family drives larger utility vehicles, how to transport a child safely in a pickup truck, safe, secure, and ready for the road ahead.