Let’s Craft is a special feature full of great crafts, inspiration and DIY projects that are perfect for any Modern Mom!
This project comes from Jessica Begum, the crafty momma behind the blog Hipster’s Tea Party. Check out her tutorial for these adorable paper wall flowers:
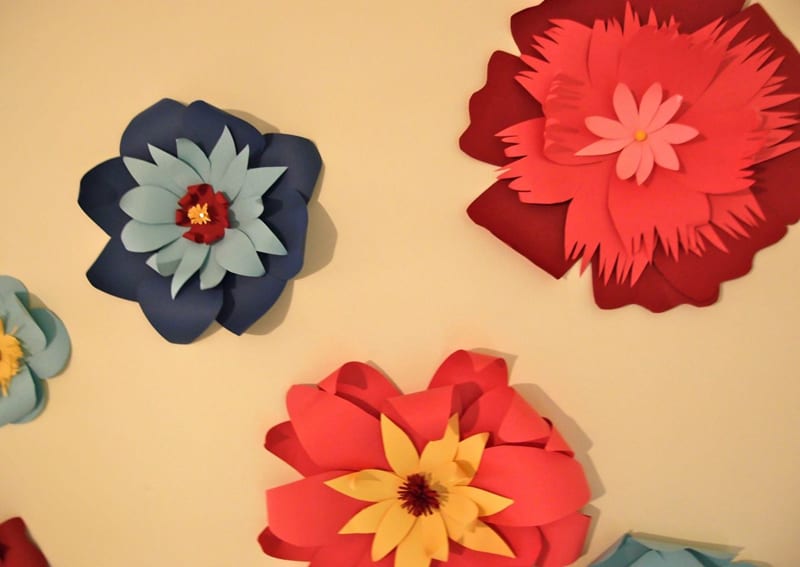
“What says “welcome springtime” more than these gorgeous wall flowers?! I made a neutral version of these a few years back for my own room, and loved them so much, I decided to make a bunch of them to go above my daughters bed as a statement piece.
So, I ditched the neutral, and went bold! I chose a color palette based on their bedding, and we had a whole lotta’ fun at the paper store choosing paper! You can do what I did and make a statement wall piece, or make flowers for a springtime wreath or as a centerpiece for your Easter table.”
Supplies
- Card stock
- Glue gun
- Manila folders or scrap cardboard
Directions
Start by determining how big you want your flowers. My biggest flower was 14″ in diameter using 8 outer petals. I got 2 petals from one piece of card stock:

Then, I cut smaller petals for the center of the flowers. I didn’t really have a specific formula, I started with the outer petals and went from there. I determined how many petals I could cut from a 8 1/2 x 11 piece of card stock.
Here is a rough formula to give you a sizing ballpark:
2 petals per page = 14″ diameter flower
4 petals per page = 11″
8 petals per page = 8″

Really easy to assemble! Cut a rough circle from a manila folder or scrap cardboard, about 2″- 4″ smaller than your flower. Just glue the petals one by one on the cardboard in flower pattern. Avoid going around the flower in a circle. In other words, keep your petal placement random. Once you have the outer petals formed, continue with another ring of different shaped petals in the center.

Finish by curling the petals around a pencil or a wooden spoon handle. I curled some petals forward, and some back to give them a bit more of a whimsical look.
Petal shapes: Don’t worry about making every petal exactly the same, or cutting them perfectly. Once the flower is put together, no one will be looking at your imperfections. I always think it’s better to have less uniformity anyways.
Experiment with different shapes. Heart shaped, sunflower petal shaped, fringed on the end, round, clover shaped, you can’t go wrong!
More techniques: Like I said, I made these a few years back. Here is a link to other techniques I used the first time on my blog.
To hang your flowers, you can make a hook by hot gluing a piece of fishing line on the back or just stick a nail directly through the center of the flower and hammer into the wall. I even used thumb tacks for the smaller flowers.


 Planning to try this at home? We’d love to see how it turns out! Send us photos of your crafty efforts and we’ll add them to our photo gallery!
Jessica Begum is a crafty momma of two living on the west side of Los Angeles. Her blog Hipster’s Tea Party is mostly mom and kid friendly crafts, partly ideas for more ambitious projects, and a sprinkle of art and recipes thrown in just for fun. As well as being crafty, she is classically trained in fine art and loves to paint with watercolors and oils. You can join her in a craft, see her paintings, or get inspired at www.hipstersteaparty.com