This past weekend, baby Aria and I went to Cox Farms in Centreville, Virginia. We has a FANTASTIC time walking around visiting with all the farm animals and there were lots of them: Goats, donkeys, bunch of little piggies, horses, rabbits, and baby chicks to name a few.
Mommy indulged in some awesome farm foods: hot dog and fries (first time in like eight months), popcorn, honey roasted almonds and fresh squeezed lemonade. Let’s face it all that food was super delicious – I’m sure not so delicious for my waistline, but oh well, it was just this once!
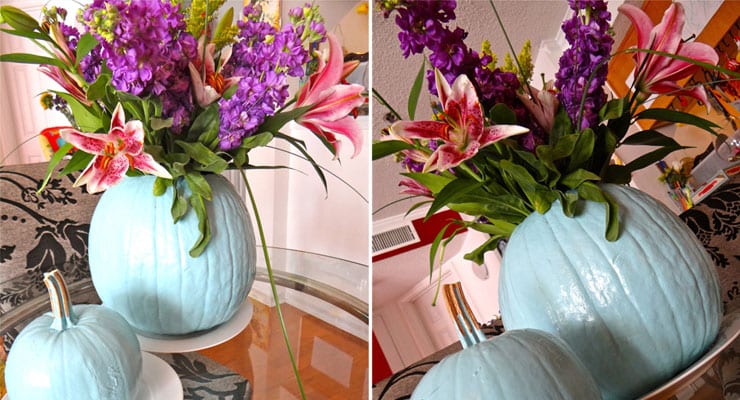
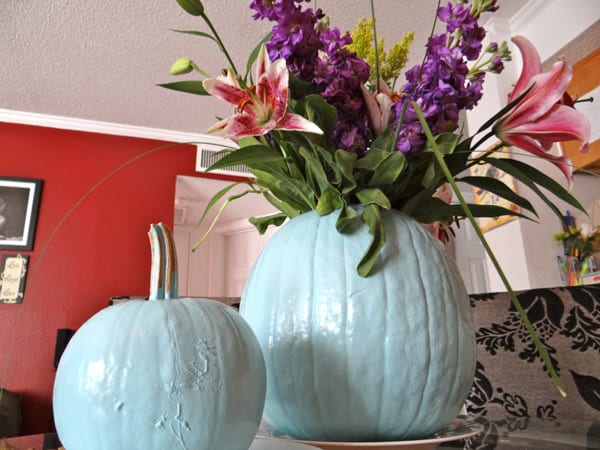
Of course, we came home with pumpkins! I bought a big one which I painted a blue/green color (Tiffany color, which is also the color of my bathroom walls). At first I couldn’t decide what color to paint it so when I realized I had that paint left over from when I moved in, I was all game…and, well, excited!
If you’d like to give this a whirl, it’s super simple and fun to do with your kids and friends.
Supplies
- Pumpkin
- Paint
- Paintbrush
- Flowers
Directions
1. Clean the pumpkin, dry it.
2. Cut out the top, clean the inside of the pumpkin; turn the pumpkin upside down so the top is facing down.
3. Using a paint brush, paint the pumpkin with your color of choice; let the paint dry overnight.

(Ready for flowers)
4. Use a small glass vase or jar (I used an empty Prego tomato sauce jar).
5. Arrange your favorite flowers, use as much as possible to get the FULL bloom effect.
6. Place the flower vase inside the pumpkin and carefully arrange the flowers around the top of the pumpkin and viola, how pretty does that look?!
Do you like my no-carve pumpkin for Halloween? How are you carving (or not carving) your pumpkin for Halloween?