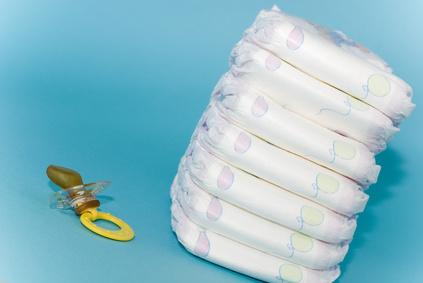
Diaper cakes consist of diapers, baby clothes and other baby items being creatively put together to resemble a traditional tiered cake. This style of cake is fairly easy to make and allows plenty of room to adapt to any theme or color scheme. Make a diaper cake to serve as a baby shower centerpiece and gift for the mom-to-be or as a "welcome home baby" gift. The new parents will likely enjoy the beauty of the diaper cake as well as all of the little gifts you can include as "ingredients."
Diaper cakes consist of diapers, baby clothes and other baby items being creatively put together to resemble a traditional tiered cake. This style of cake is fairly easy to make and allows plenty of room to adapt to any theme or color scheme. Make a diaper cake to serve as a baby shower centerpiece and gift for the mom-to-be or as a "welcome home baby" gift. The new parents will likely enjoy the beauty of the diaper cake as well as all of the little gifts you can include as "ingredients."
Step 1
Open the diapers one at a time so they are flat, as if you were going to slide them under a baby. Roll the diaper as tight as you can and slip a rubber band around it to hold it in a roll. Repeat this until all of the diapers are rolled.
Step 2
Place a small, round plastic container with flat sides on the center of your cardboard or other sturdy, flat base. A bottle, baby lotion or other round bottle will work as well. This will serve as the center of your first tier and will be hidden from view once the diapers are in place.
Step 3
Fill the container with small goodies, such as baby booties, pacifiers, washcloths or other extras if you desire as a bonus surprise when the diapers are used.
Step 4
Create a circle of diapers around the container or bottle and hold them in place with a large rubber band. Make a second row of diapers around the first for to create the first tier. Make a third ring of diapers if there is room on your cardboard or base.
Step 5
Secure the first tier of diapers by cutting off some of your ribbon, then tying the ribbon around the diaper ring. The ribbon should also hide the rubber bands so all you see is the white of the diapers. Secure the ribbon with tape, if needed.
Step 6
Put together the second tier by grouping five to seven diapers together to create an inner ring, then filling in an outer ring. Secure each with a rubber band, then the entire tier with ribbon like you did the first tier. (The only difference between the first and second tiers is the first has a container in the center and should be slightly larger.)
Step 7
Group another five to nine diapers together to create the third and final tier. Tie a decorative ribbon around the diapers, making sure to hide the rubber band.
Step 8
Gently slide two or three chop sticks or wooden dowels into the bottom tier in between diapers, spread out evenly. Fit the second tier on top of the first, over the sticks. This will help hold the diaper cake together. Repeat the process for the top tier.
Step 9
Decorate the diaper cake by sliding washcloths, toys, baby socks, bibs or other items under the ribbon or tying the items to the ribbon. Place a stuffed animal or small toy on top of the cake.
Photo Credit
- babywindeln image by Daniel Fuhr from Fotolia.com