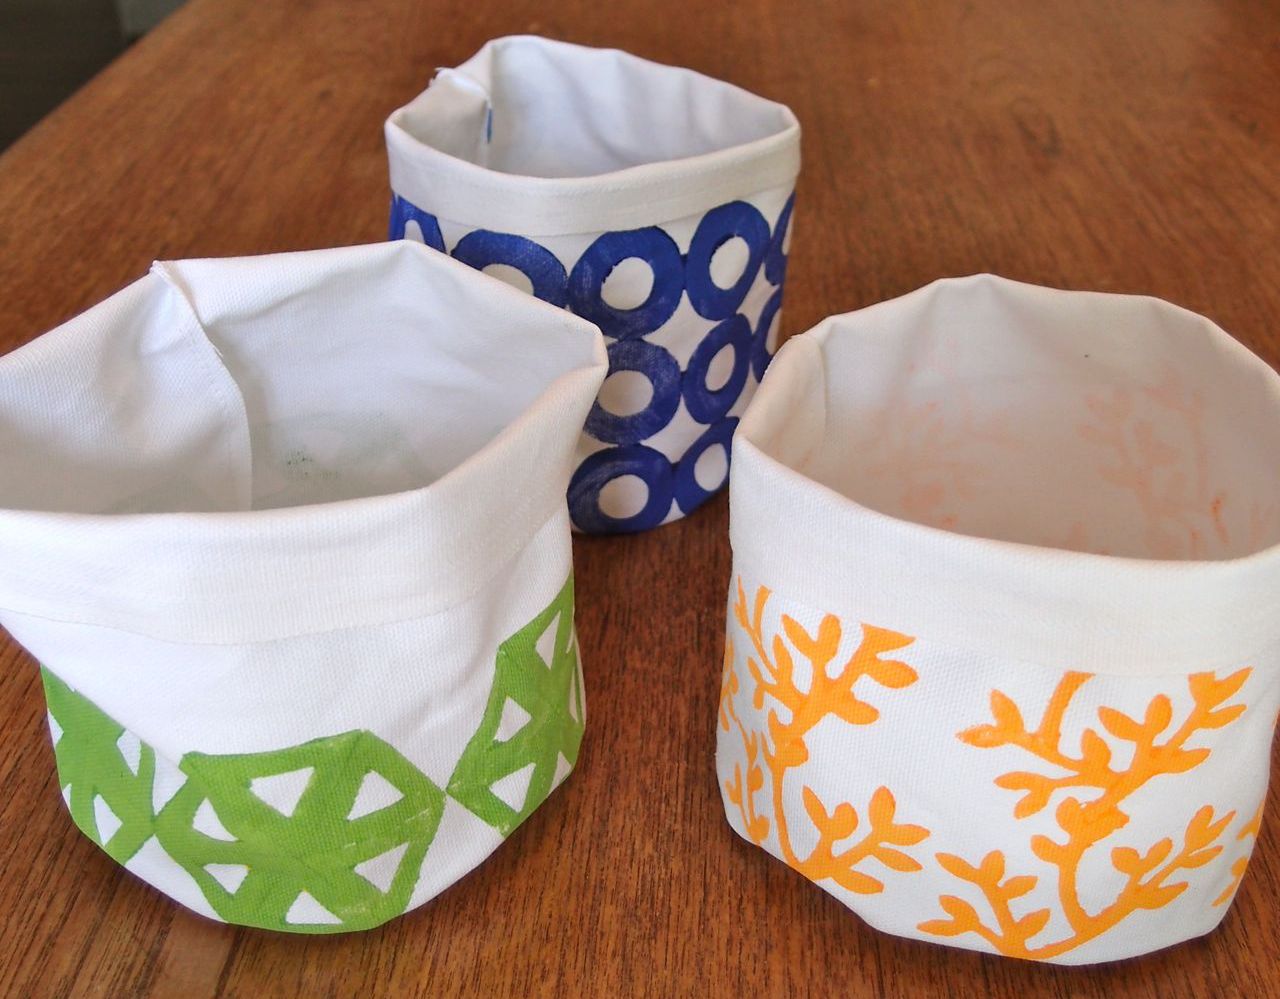
This project comes from, Jessica Begum, the crafty momma behind the blog Hipster’s Tea Party:
“Use these cute little bags for practically anything! Stick your car keys in them, loose change, put a plant in them, whatever!
I’m using my storage cube to organize my crafts. Yes, they do require a bit of sewing, but if you are a novice sewer and want to try these out, it’s pretty easy. If you just can’t handle the thought of a needle and thread, you can block print on a pre-made canvas tote, or make your own stationary.
Certainly do not be afraid to make a printing block, because my method is foolproof! Practically cheating!! Block printing is a technique originated in India that repeats a pattern onto fabric using a carved block.
True block printers carve their own designs out of linoleum using a special gauge tool, but we are going to use foam stickers! SO easy your kids can do this right alongside of you.”
Supplies:
For block printing
- 3×5″ or similar sized wooden bock – Available at craft stores
- Foam stickers
- Fabric paint
- Foam brush or brayer
For canvas containers
- Thick white canvas
- Scissors
- Ruler
- Pencil
- Sewing machine or a needle and thread if you have the patience to sew by hand.
Directions:
Start with your canvas containers. Use some sort of circle template to create the bottom of the containers. I traced a plastic container onto my canvas and got a circle 5 3/4 in diameter.
Trace the back side of your canvas and cut out about a 1/4″ wider then your tracing. Now, think back to your high school geometry class, because we are going to use a little math here. To get the circumference of your circle (the length all the way around the circle) you are going to times Pie (3.14) with the diameter of your circle. Please don’t worry about being exact! Round to the nearest reasonable number. Don’t you wish you could have done that in geometry class! For example, my diameter is 5 3/4. So my equation is 5.75 x 3.14 = 18.055 or, simply 18.
Now you need the sides of the container. I made the sides of my container the same height as the diameter (5 3/4) and added an extra 1/4″ for sewing = 6. So the sides of my containers measure 6 x 18 1/2. (I added an extra 1/2″ for sewing.) Cut out. I used the finished edge of the canvas for the tops of my container. If you don’t have a finished edge, you may want to sew the top down so it doesn’t frey.
To make the printing blocks, take some foam stickers and stick them on the block! Easy as that!
Okay, okay, there is a bit more. You want to make a pattern that will repeat nicely. Repeated geometric patterns work well. Using a lot of the same sticker will give you a usable pattern. Experiment first before you stick. Tip: Put your stickers right up to two edges of the block rather than centering the image. That way you will know exactly where to put your block when you repeat your pattern while printing.
Then, apply fabric paint to the block with a foam brush and test print onto a scrap piece of canvas.
Apply more paint and begin printing about a 1/4″ higher than the bottom of the canvas strip. Apply more paint with each print, pressing down firmly onto the canvas. Continue the length of the strip.
If you end up short, place a piece of paper under the edge of the strip and continue printing over the edge of the canvas so you don’t have any blank space. I like my prints a little rustic and homemade looking so I don’t mind imperfections in the print. But, if you prefer a nice, sooth print, use a brayer to apply the paint, and touch up with a brush.
Let dry completely.
Next, cut notches on the outer ring of your canvas circle. Place the two right sides of the circle and strip together. The edge of the canvas strip should be at the top middle of the circle, with the circle on top.
Load it into your machine and begin sewing with a straight stitch keeping your bottom canvas strip straight and pulling the circle in as you sew. The line on the circle should stay parallel to the strip.
Continue all the way around until the bottom of the container is attached.
Then stitch the side together and turn right side out:
I folded the edge of my containers down, but you do as you like. If you want your containers a bit more sturdy, you can paint the inside of your canvas with gesso. Now, go put your containers to good use! Happy printing!