

What Every Mom Should Know About Toddler Ear Cleaning Safety
Toddler ear cleaning safety is one of those parenting topics that sounds simple — until you’re holding a cotton swab, staring into your little one’s ear, and suddenly wondering if you’re about to do more harm than good.
Here’s the quick answer most parents need:
- Don’t insert anything into your toddler’s ear canal — not fingers, not cotton swabs, nothing
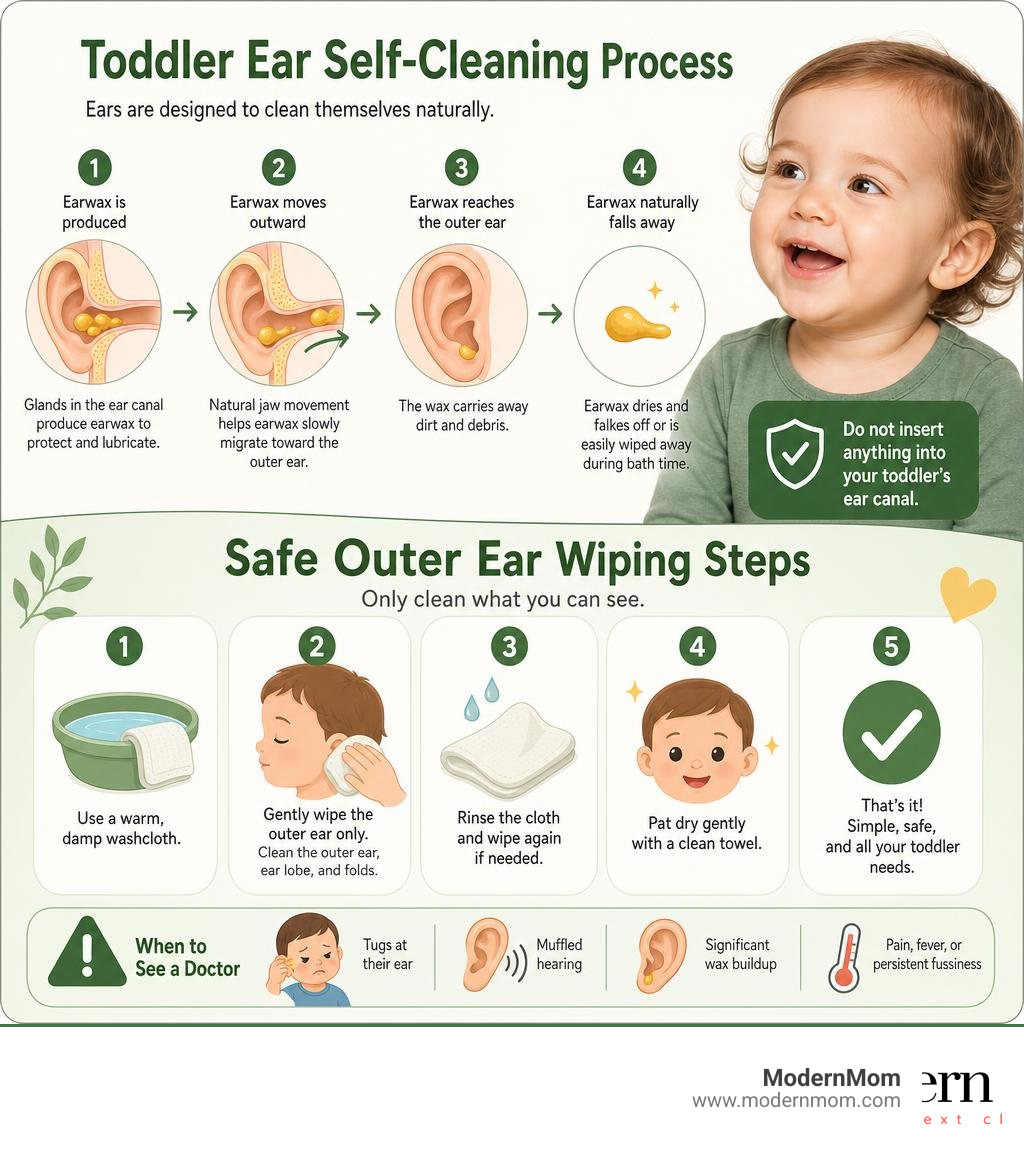
- Ears are self-cleaning — earwax naturally migrates out on its own
- Only clean what you can see — wipe the outer ear gently with a warm, damp washcloth
- See a doctor if your toddler tugs at their ear, seems to have muffled hearing, or you notice significant wax buildup
That’s genuinely all most parents ever need to do.
But if you’ve ever felt that sudden urge to grab a Q-tip the moment you spot a bit of wax in your toddler’s ear — you’re not alone. It feels like the hygienic thing to do. The truth is, that instinct can actually hurt your child. According to pediatric research, cotton swabs send roughly 12,500 children to the ER every year — about 34 kids every single day. Nearly 16% of those injuries happen when a well-meaning parent is doing the cleaning.
Earwax isn’t dirt. It’s not a hygiene problem. It’s actually a sign that your toddler’s ears are doing exactly what they’re supposed to do.
This guide will walk you through everything you need to know — from how ears actually clean themselves, to the one method that’s safe to use at home, to the warning signs that mean it’s time to call the doctor.
Why Earwax is Actually Your Toddler’s Friend
It is easy to look at a clump of dark, sticky wax in a little ear and think, Yuck, I need to clean that out right now. But in the medical world, earwax is highly respected. Known clinically as cerumen, earwax is a natural, healthy substance produced by specialized glands in the outer third of the ear canal.
Earwax acts as a self-made, waterproof shield for your toddler’s delicate eardrum. It traps dust, dirt, hair, and other microscopic particles before they can travel deeper into the ear. Even better, it contains natural chemicals that fight off bacteria and fungi, actively preventing painful conditions like swimmer’s ear.
You might notice your toddler’s earwax looks different from day to day — sometimes it is golden-yellow and sticky, while other times it is dry, flaky, or dark brown. All of these variations are completely normal. Some children are genetically prone to dry wax, while others produce a stickier version.
No matter the texture, the ear handles its own housekeeping. Microscopic hair-like structures called cilia, combined with the natural outward growth of the skin lining the canal and the jaw movements of chewing and talking, slowly push old wax out of the ear canal. Once it reaches the outer ear, it simply falls out or washes away during bath time. When we try to intervene, we disrupt this beautiful, self-regulating system.
The Golden Rules of Toddler Ear Cleaning Safety
When it comes to keeping those little ears clean, our golden rule is incredibly simple: less is always more.
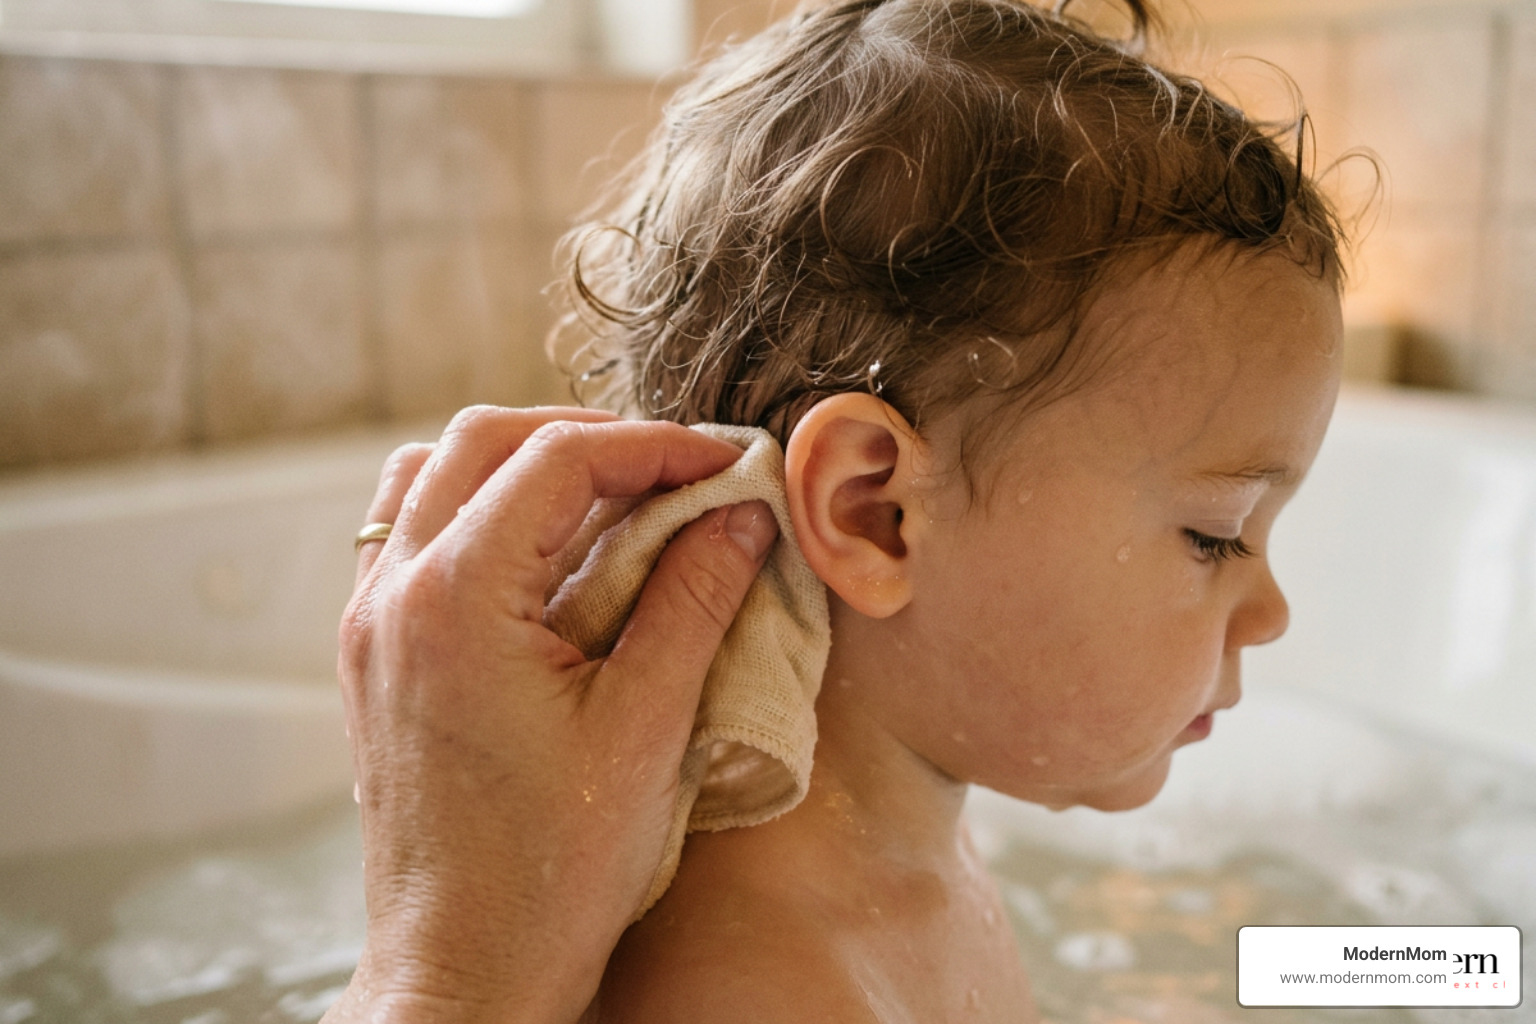
To clean your toddler’s ears safely at home, you only need a soft washcloth and some warm water. Here is the step-by-step method pediatricians recommend:
- Wait for Bath Time: The warm water and steam from a bath or shower naturally soften any dry wax that has migrated to the outer ear.
- Dampen a Soft Washcloth: Dip a clean washcloth in warm water. Do not use soap, as it can irritate the sensitive skin of the outer ear. Wring it out thoroughly so it is not dripping.
- Wipe the Outer Ear Only: Gently wipe around the outer portion of the ear (the pinna) and the area behind the ear. Focus only on the parts of the ear you can easily see.
- Pat Dry: Use a dry towel to gently pat the skin dry.
- Dry Intact Ears Naturally: If water gets trapped in their ears after swimming or a bath, encourage your toddler to tilt their head to the side to let it drain.
If your toddler hates having water in their ears, you can hold a hair dryer on its lowest, coolest setting about 10 inches away from their ear for a few seconds to gently dry out the moisture.
Why Cotton Swabs Violate Toddler Ear Cleaning Safety
We have all seen the warnings on the box, yet cotton swabs remain the most common tool parents reach for. But when we insert a cotton swab into a toddler’s ear canal, we are actively working against their body’s natural defense system.
The ear canal is highly sensitive, and the eardrum is incredibly delicate. In children, the eardrum sits just 1 to 1.5 centimeters deep. Because cotton swabs are wider than a toddler’s narrow canal, they do not actually scoop wax out. Instead, they act like a plunger in a syringe, packing the soft wax tightly against the eardrum. This leads to cerumen impaction, which can cause pain, temporary hearing loss, and infections.
Worse, one sudden wiggle from an active toddler can cause the swab to puncture the eardrum or damage the delicate hearing bones sitting directly behind it. With more than 10,000 cotton-swab-related pediatric ear injuries reported in the US each year, keeping these tools out of the bathroom is one of the best safety decisions you can make. Just as we prioritize safety during major family changes — like learning How to Ease the Transition When Bringing Home a New Little Sibling — we must protect their physical safety in our daily routines.
The Dangers of Ear Candling and Tech Scrapers
In the search for alternative remedies, some parents discover “ear candling” or smart, camera-assisted ear scrapers. Pediatricians and ENT specialists agree: avoid these entirely.
Ear candling involves placing a hollow, cone-shaped candle into the ear canal and lighting the exposed end. Proponents claim the heat creates a vacuum that pulls out wax, but clinical studies show it does no such thing. Instead, it poses an extreme risk of severe burns to the face and ear canal, candle wax blockages, and eardrum perforation.
Similarly, smartphone-connected camera scrapers are highly risky. Because it is incredibly difficult to judge depth when looking at a 2D screen while navigating a tiny, curved 3D space, one slip can scrape the highly sensitive canal skin or puncture the eardrum.
Recognizing the Signs of Earwax Buildup and Impaction
How do you know if your toddler actually has an earwax problem, or if they are just being a toddler? Because young kids cannot always explain what they are feeling, we have to look for behavioral clues.

Keep an eye out for these common signs of earwax impaction:
- Frequent Ear Rubbing or Tugging: Your toddler may constantly poke their finger into their ear or pull at their outer ear.
- Muffled Hearing: They might not respond to your voice as quickly as usual, or they may ask you to turn up the volume on their favorite show.
- Complaints of Fullness: Older toddlers might say their ear feels “plugged” or like there is water stuck inside.
- Itchiness or Discomfort: They might show signs of irritation, especially when chewing or yawning, as jaw movements shift the packed wax.
- Visible Blockage: If you look into their ear with a flashlight, you might see a solid wall of dark brown or black wax blocking the canal.
Monitoring these physical developments is just as important as keeping track of other milestones, such as understanding How Much Weight Should a Baby Gain during their early years.
Safe Home Remedies vs. Professional Medical Removal
If you suspect your child has a mild buildup, it is important to know which remedies are safe to try at home and when it is time to let a doctor handle it.
| Safe Home Remedies (With Doctor Approval) | Professional Medical Removal |
|---|---|
| Warm Mineral or Baby Oil: 1-2 drops to soften dry wax | Manual Curetting: Gentle scraping with specialized medical tools |
| Diluted Hydrogen Peroxide (50/50 with water): Softens stubborn wax | Micro-Vacuuming: Safe, controlled suction in an ENT office |
| OTC Softening Drops: Pediatrician-approved drops | Professional Irrigation: Controlled flushing with body-temperature water |
If you want to try softening the wax at home, always consult your pediatrician first. If they give you the green light, you can use an eye dropper to apply 1 to 2 drops of warm mineral oil, baby oil, or a 50/50 mix of hydrogen peroxide and distilled water once a day for up to five days. Let the toddler lie on their side for a few minutes to let the drops sink in, then let them sit up so the liquid can drain onto a clean cloth. For a deeper look at how medical professionals safely manage this process, see How To Remove Cerumen Manually and With Irrigation.
Is Ear Irrigation Safe for Toddlers at Home?
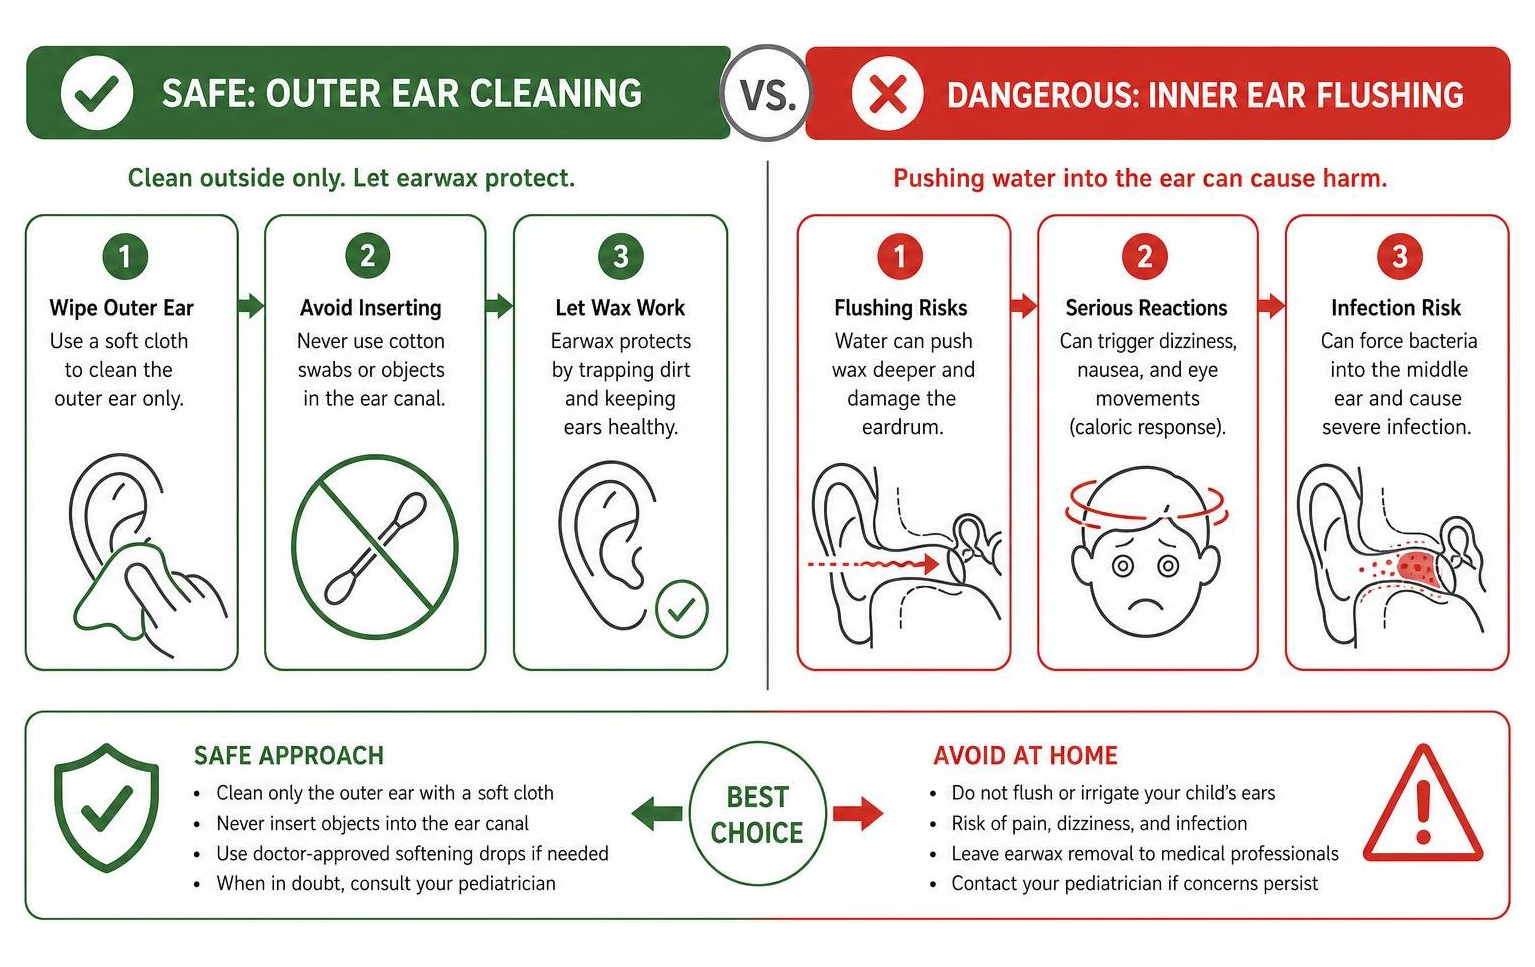
Many parents wonder if they can use a bulb syringe to flush out their toddler’s ears at home. We highly discourage home ear irrigation for toddlers.
First, flushing water into the ear requires exact temperature control. If the water is even slightly too hot or too cold, it triggers a physiological phenomenon called the caloric response. This stimulates the inner ear’s balance center, causing sudden, severe dizziness, rapid eye movements (nystagmus), and nausea.
Second, if your child has an undiagnosed perforated eardrum or has tympanostomy (ear) tubes, flushing water into the ear canal can force bacteria into the middle ear, leading to severe pain and infection. To understand the clinical risks and strict guidelines surrounding this procedure, read the medical overview of Ear Irrigation.
When to Call a Pediatrician for Toddler Ear Cleaning Safety
If home softening drops do not clear the wax within a few days, or if your child is in pain, it is time to call your pediatrician.
A doctor can use an otoscope to look directly into the canal and determine if the issue is actually earwax or an active middle ear infection. If the wax is impacted, they have the training and specialized tools — like tiny ear curettes or gentle suction devices — to remove it safely without pushing it deeper.
For highly uncooperative toddlers who cannot stay still, a pediatric ENT may occasionally recommend performing the procedure in a controlled clinic setting or under light sedation to prevent accidental injury. If you suspect your child has inserted a toy or foreign object into their ear rather than just having wax, read the pediatric emergency guidelines in Irrigation for Ear Foreign Body Removal.
Frequently Asked Questions About Toddler Ear Care
What should I do if I accidentally injure my toddler’s ear while cleaning?
If your toddler flinches while you are cleaning their ear and you notice bleeding, pain, or crying, stop immediately. Do not apply any ear drops, and keep the ear completely dry. Call your pediatrician or visit an urgent care clinic right away so a doctor can inspect the canal and eardrum for scratches or perforations.
Are over-the-counter earwax drops safe for toddlers?
Over-the-counter drops can be safe, but you should never use them without checking with your pediatrician first. They are strictly contraindicated if your child has ear tubes, a history of a ruptured eardrum, or active fluid draining from the ear.
How can I prevent earwax buildup in my toddler’s ears?
The best way to prevent buildup is to keep cotton swabs, fingers, and toys out of their ears. Ensure they stay well-hydrated, as dehydration can make earwax drier and harder to expel. Letting ears naturally drain during bath time is the best way to maintain healthy ears.
Conclusion
At ModernMom, we know how easy it is to worry about every little detail of your child’s health. But when it comes to toddler ear cleaning safety, the best approach is also the easiest: step back, put down the cotton swabs, and let their body do its natural work. Focus on keeping the outer ear clean with a warm washcloth, and leave the inner canal to the experts.
For more practical, stress-free parenting tips to keep your little ones safe and sound, check out our comprehensive ModernMom Baby Sleep Safety Guide.